+2 Aim+2 Willpower+2 Strength+2 CunningGreen Matrix Shard


Note: The +2 Cunning datacron is listed as hard primarily because there it contains 1 jump that people commonly fail, and it can take 5+ minutes for a player to get back to that spot, making this datacron a frustrating endeavor for many.
INSTRUCTIONS:
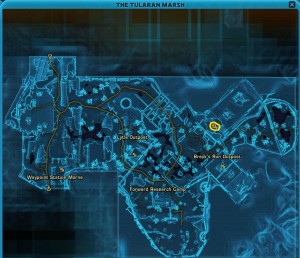
To get to the start point, begin at the Brejik's Run Outpost Speeder in Tularan Marsh. If you don't yet have the flight path, any of the others in Tularan Marsh will do (you'll simply walk a bit more).
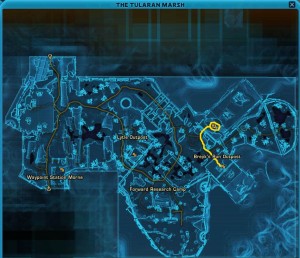
To get into place, follow the maps below:
I highly suggest clicking on the maps above for a larger view, as the start-point is near a dotted-road and can be a little tough to see.
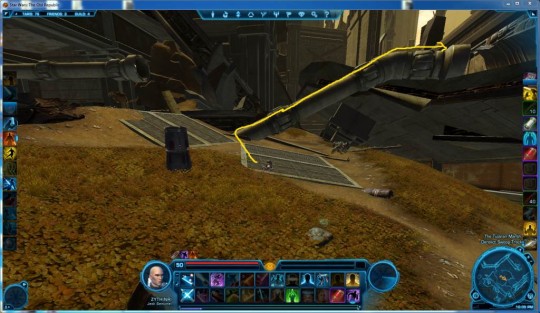
Once in place, you go up a nearby pipe. Piece of cake.
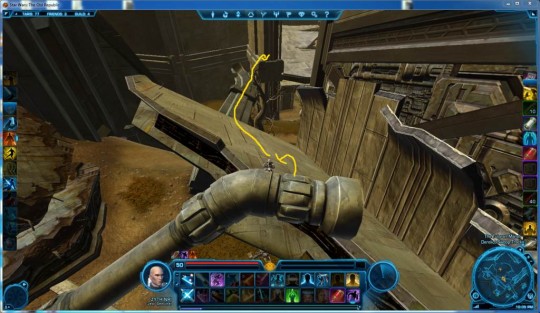
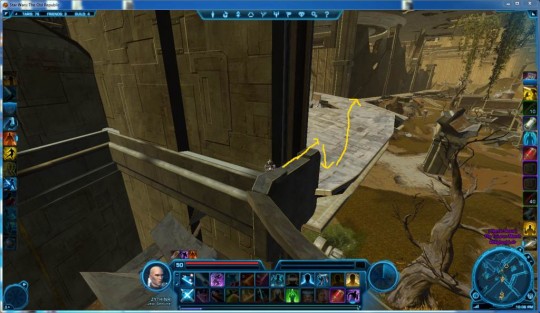
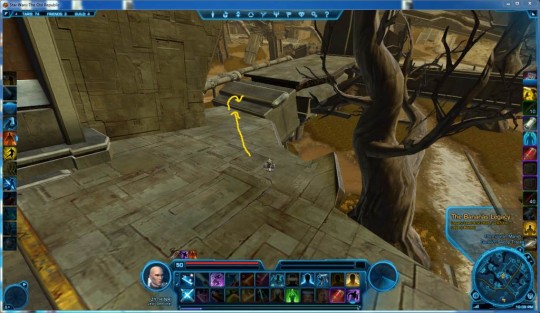
From there, you'll be jumping onto a platform, then following the path you see below to get up onto a ledge. It may help to click the image below, since it's off in the distance.
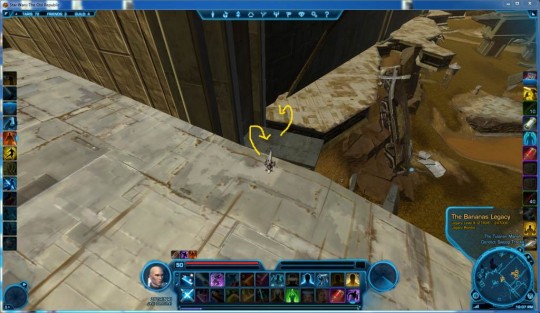
Next you'll see we're on the ledge, jumping onto the large platform below. Still nothing difficult, just head to the other end of the platform.
This isn't the hard jump (below), but it's possible to miss. I usually don't do this one on a speeder. Do a running jump, get in position again, and do another running jump.
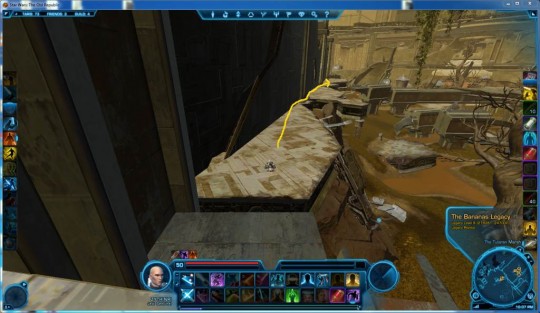
Now that we've made the jump, look below. We have to follow the wall along this side. You'll probably make a few little jumps here, but if you fall off it'll probably just be a silly mistake.
Keep an eye on the right – soon we'll be reaching the next “stage” where we leave the wall and start going right.
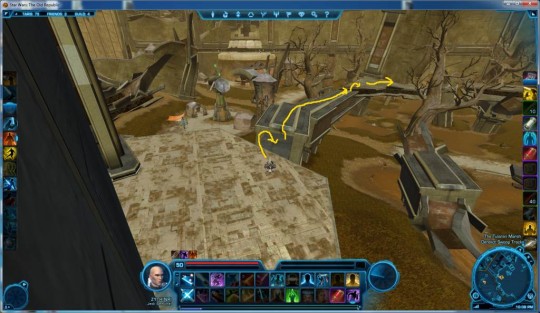
Below is the spot we watched for. Continue across the yellow lines, making a few running jumps where necessary.
Now we're coming up to the dangerous jumps. This 1st one isn't too bad (it's possible to miss, but you probably won't).
The one coming in the next picture is the painful one.
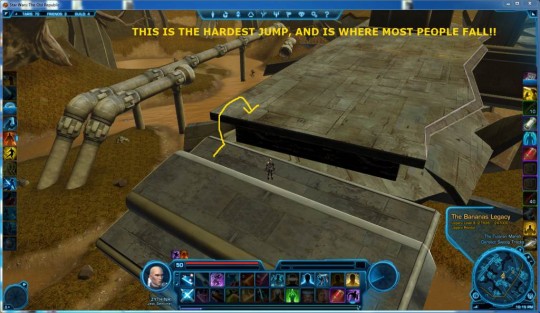
Ok, here it is. Most people have fallen here at least once, and it's a long journey back to the start. A few tips are written below the picture, as this one can be really tough:
TIPS:
- Start at the left side (near where the yellow arrow is), and take a running jump. The gap widens at the right side.
- Back up as much as you can (without going up the raised “center” section) before running.
- Do NOT start from the raised “center” section (just behind my character above). Many try do to it because they feel they need more “prep” space to run, but in actuality their character falls to the lower section a fraction of a second before they jump, and it almost always bugs their jump. You MUST start from the lower section where I, and the yellow arrow are.
- TURN SPRINT ON – You can make the jump from anywhere along the left 75% with sprint (your level 14 ability) on.
- IF YOU DON”T HAVE LUCK WITH SPRINT ON – you can turn sprint off, but you MUST make the jump from the far left side. Only the left 20% is possible with sprint off.
- If for whatever reason you can't get enough move-speed before jumping, you can do it at a slight angle, but only with sprint turned on.
Good luck!
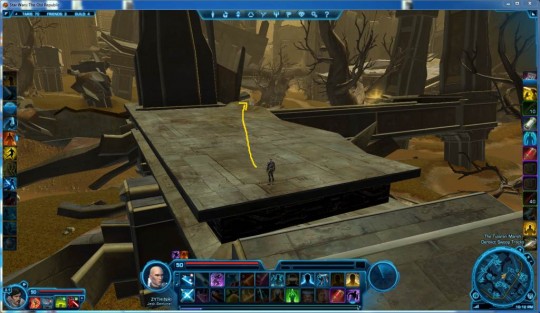
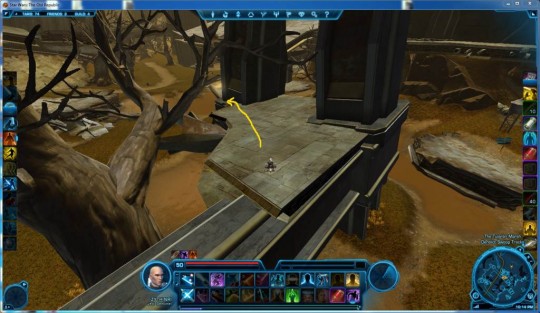
Now that you've (hopefully) made the jump, you're almost there. Follow the yellow line below.
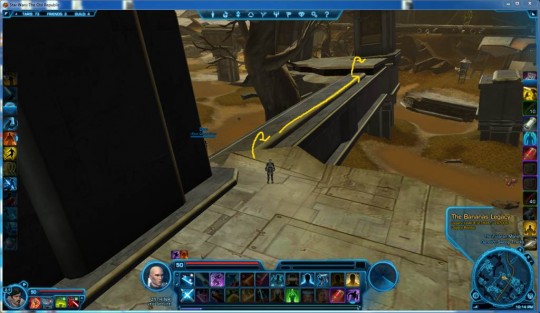
A short jump here, and another short jump up.
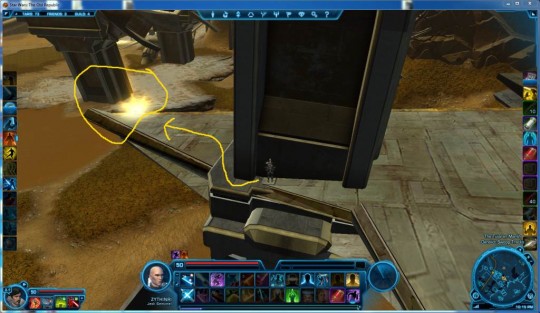
Now that we're up, we head to the side. The datacron is hiding just behind that beam. It's a narrow ledge, but as long as you don't do anything silly, you shouldn't fall.
Finally! Just don't slip, and you'll have the datacron.
Once you have the datacron, you can simply jump down. If that makes datacron #4 for you (all the ones which can be solo'ed), grab a friend, and look through the next guide for the Green Matrix Shard.
+2 Aim+2 Willpower+2 Strength+2 CunningGreen Matrix Shard
<< Back to Taris
This site only has 1 like. And it's from Jar Jar Binks.
