+3 Aim+3 Presence+3 Strength+3 CunningYellow Matrix Shard


WARNING #1: To get the Yellow Matrix Shard, you MUST have the SLOT DECODER CARD obtained when you get the previous +3 Cunning datacron. If you do not have the slot decoder card, visit the +3 Cunning walkthrough first!!!
WARNING #2: This datacron is in an area of Nar Shaddaa (the Bonus Series quest area) with level 30-31 mobs. It can be very challenging if you are considerably lower in level.
This datacron contains a few difficult jumps, and because the mobs are at the upper-end of Nar Shaddaa's level range, falling usually means you aggro a group. The mobs respawn rather quickly, so you'll probably have to deal with them (2 different groups) every few attempts. If you aren't able to kill them, it's possible to death-run the jumps during the 8s stealth you get after you rez, but obviously this can take an extraordinary amount of time if your rez timer gets too high.
INSTRUCTIONS:
The Yellow Matrix Shard is located in the Network Security District.
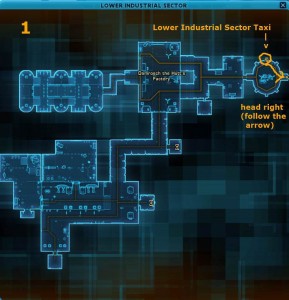
Chances are that you've just completed the +3 Cunning datacron and are already in a nearby area. However, just in case you aren't, here are the directions from the LOWER INDUSTRIAL SECTOR taxi again:
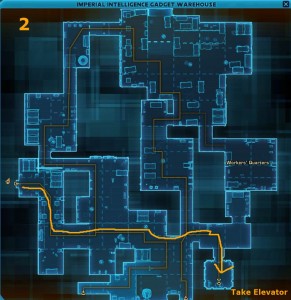
You must take the elevator in #2 above to HIGH SECURITY LOCKDOWN.
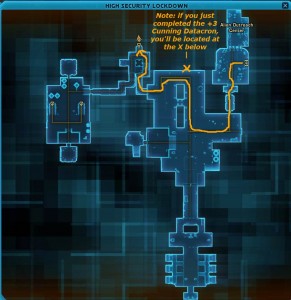
Following #1 and #2 will place you in High Security Lockdown. If you just completed the +3 Cunning datacron and grabbed the slot card/decoder (hopefully you have – you need it for this datacron), you're already here, and will be located by the X in the left image below.
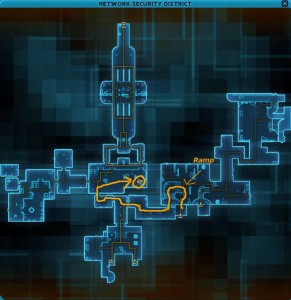
Either way, follow the arrows above to get from High Security Lockdown to the Network Security District, and then to the start point for the Yellow Matrix Shard. Click on either of the images if you prefer a larger view.
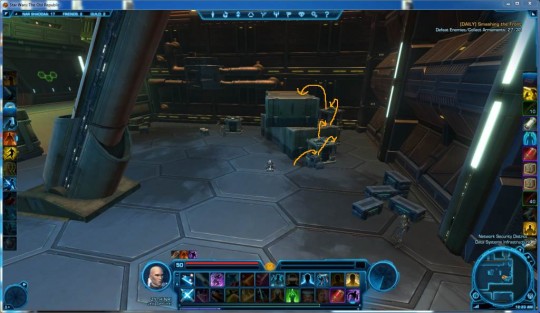
Now, you should see something like this:
Follow the arrows for the above set of jumps. They're not too tough, although if you didn't clear the nearby mobs, they may aggro on you. If you're a low level, you can evade-bug the mobs on the large box (last arrow above). Once they've evaded, you can dismiss your companion (since they're probably dead), resummon them, and continue.
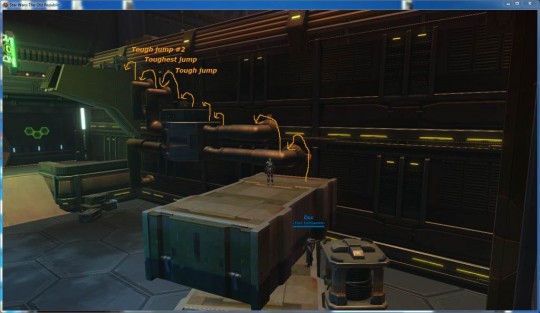
Next comes the trickier jumps (click image below for a larger version).
I labelled the hardest ones in the image above. I usually turn SPRINT OFF for these so that I get a little more precision in my jumps.
- Tough jump is from a box to a pipe. Your biggest concerns are getting enough movespeed while on the box, and making sure you don't over-shoot the pipe.
- Toughest jump is pipe-to-pipe. You need to back up as far as possible on the pipe so that you get a good run, and make sure you hit spacebar at the last possible moment (easiest with sprint off). At the same time, you don't want to over-shoot the jump and end up walking right off (again, easiest to “catch” yourself with sprint off).
- Tough jump #2 is like “toughest jump” except that you don't have to worry about over-shooting this time.
The bad news is that the jumps can be quite tough (I've seen level 50′s give up). The worse news is that mobs are waiting right below. So if you fall, you have to spend time killing them (or if you're considerably lower in level, spend time trying to get back onto the boxes before you die). Note also that if you're a low level, the mobs who aggro from below will “evade” mid-way through, when you're on the non-pipe section – it's a good opportunity to let your companion die and dismiss/resummon them so that if you fall during the final jumps your companion will buy you some time to get back to the start.
Again, having sprint off, and making sure you maximize the “prep” space you have for your run & jumps goes a long way. That said, if you don't have luck with sprint off, feel free to try with sprint on – different things work for different people.
If you just don't have any luck at all, you can also try jumping to the “gears” on the pipes, attached to the wall. They're a little wider than the pipes, and sometimes they can be more forgiving.
If you made all the above jumps, you're pretty much home-free.
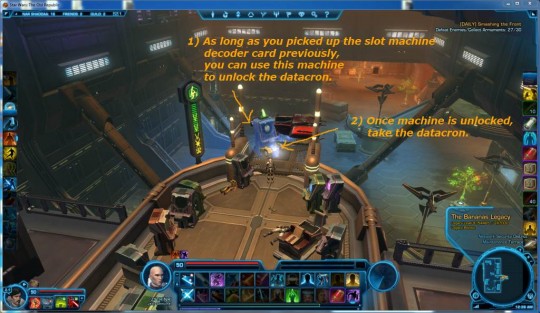
Few more jumps as you see above (you can also get a better look at the tough jumps we just did). Fortunately, the next 3 are easy. Then follow the arrow around.
Low and behold, you're at the slot machine. Now you see why we needed that decoder card from the previous datacron area.
Just click on the slot machine, it'll use your decoder card, and then you can grab the Yellow Matrix Shard.
Don't dilly-dally though, the shard is only unlocked for a little while.
Phew! Nar Shaddaa was a tough planet!
Good news though, you're probably level 25 now (or close), so datacrons on the following planets are going to be a little quicker to get to with your speeder! They also tend to have less of an emphasis on fancy-jumping, though since you've proven your awesome jumping skills, that probably wouldn't have been an issue for you anyway, right?
If you haven't grabbed the other datacrons on Nar Shaddaa, now's a good time to get them. If you've already got them, you may want to head over to the main page and check out the next planet.
+3 Aim+3 Presence+3 Strength+3 CunningYellow Matrix Shard
<< Back to Nar Shaddaa
