+3 Aim+3 Presence+3 Strength+3 CunningYellow Matrix Shard


This datacron involves a good bit of “fancy jumping”, with many opportunities to fall. Since some of the earlier quests are in this region, grabbing the datacron while questing isn't a bad idea.
INSTRUCTIONS:
You begin by taking a taxi to the Nikto Sector.
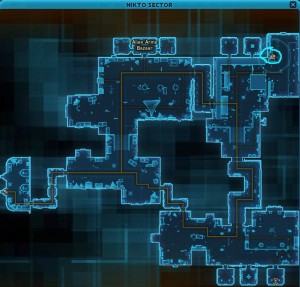
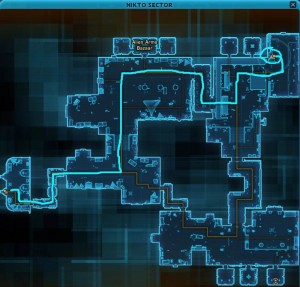
From there, follow the map below to get in position (click if you'd like a larger view).
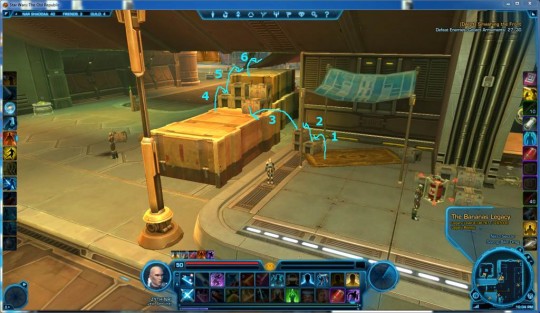
Once in place, your surroundings should look similar to below (click for a larger view).
Follow the #1 and #2 jumps.
There's not a lot of space on the crate to get the move speed to make jump #3, so turn sprint off if you're having issues. Running jumps tend to be easier with sprint off.
Tricky part: You'll see jump #4 takes you to the low crate, and you don't go onto the set of higher crates to the right of it (click image to zoom in). There is a reason for this. You can NOT make jump #5 from the high crate – you will hit your head on the ceiling if you try.
Jump #6 (onto the canopy) can take a few tries, but it's nearly impossible to fall, so just make a few attempts at it.
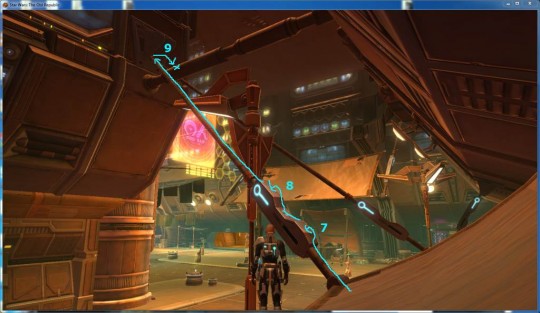
Now you should be on the canopy.
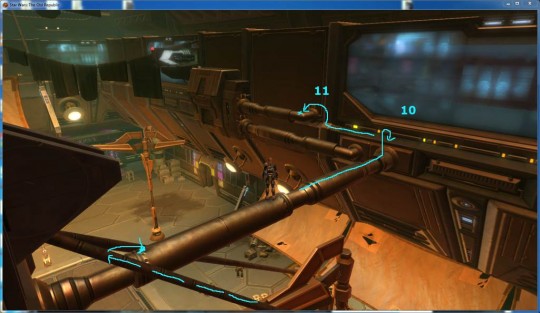
This section is easy. Walk up the “tightrope”, and then fall down to the large pipe (#9).
You should be on the pipe now.
You'll see that there's a ledge against the wall. Jump up onto it (#10), then travel a bit and make the #11 jump to the pipe.
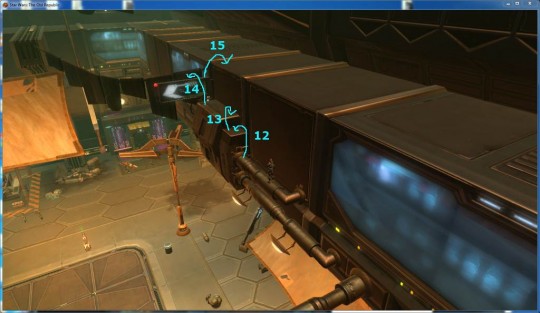
Now that we're on the pipe, click the image below to zoom in. We're about to have a tricky jump (#14).
Tricky jump: For jump #14, you're jumping over a large gap onto a thin sign. It's very easy to overjump here (usually you make the jump, but then immediately walk off), and if you do, you'll fall to the ground and have to start over. I find that having sprint off for this jump helps immensely, though if you're having issues, try with & without sprint.
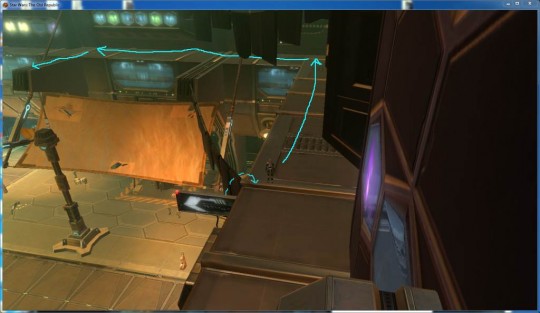
Assuming you didn't fall off the sign, you're simply jumping up to the large platform above.
Next, follow the platform around as seen below (click for a larger view if you can't see where you end up)
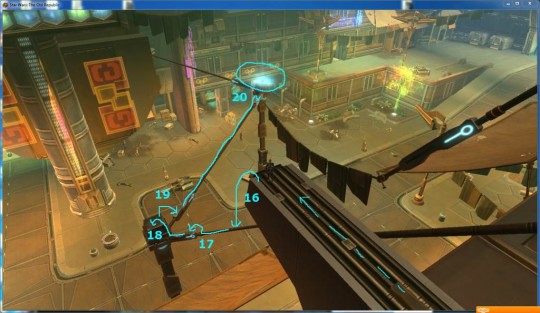
At this point, you're almost there, but you have a few opportunities to fall.
Tricky part: The first jump off the ledge can be a pain. When you're there, it looks like you can simply walk/fall off and land on the rope, but unfortunately the ledge has a slope (which you can't see in the image). If you try to “fall” off, you often hit the slope, and it bumps you away from the rope, meaning a long drop down to the start.
While I've had a few lucky “drops” onto the rope, I have found it much safer to make a running jump onto the rope. The down-side is that the rope is tiny, and if your aim isn't perfect when you run/jump, you'll miss it.
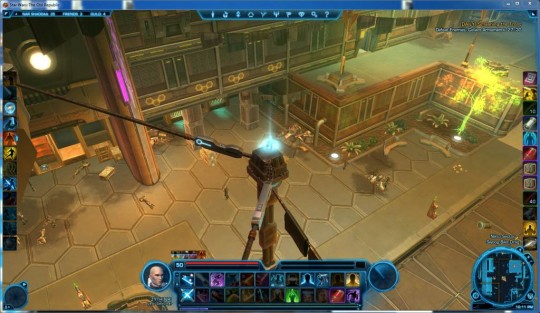
Assuming you made it to the rope, you just have a few little jumps to make. It's possible to fall, but there's nothing out-of-the-ordinary here. Be careful not to over-jump at #18 though… it happens.
And here, we're at the datacron. You can reach it from the rope (click image above to see where I'm standing), so there's no need to actually jump up on the platform.
Gratz! Your first +3 Aim (probably your first +3 anything!)
The good news: That was one of the tougher datacrons.
The bad news: 2 of the upcoming ones are even tougher. Read on!
+3 Aim+3 Presence+3 Strength+3 CunningYellow Matrix Shard
<< Back to Nar Shaddaa
This site currently has less likes than the "Star Wars kid" YouTube video. Please help.
