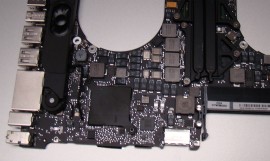
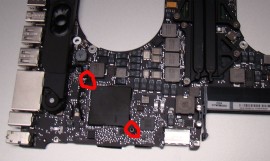
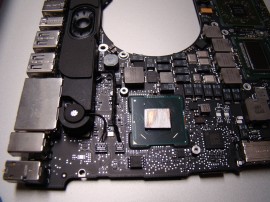
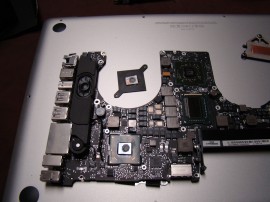
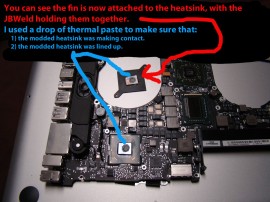
I took the opportunity to mod the heatsink for the 3rd chip on the main board.
I believe this particular chip runs the SATA and USB bus, in addition to a couple other things, though I'm not 100% sure. Not that I cared what exactly it did – even if it was a fake chip that did nothing, it was still begging to be modded.
I actually attacked this during the thermal paste mod I did on the CPU/GPU in the other write-up over here. This one gets it's own write-up though because it's just as long (though you might want to read the other writeup to see how I got the mainboard out to begin with).
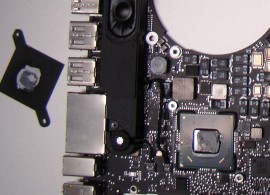
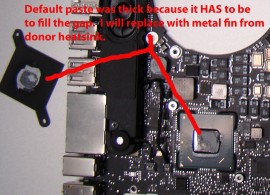
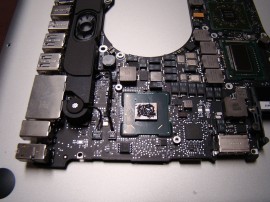
2 torx screws and it wiggled off. Pretty important to note here that with the paste cleaned up, there's a space between the chip and heatsink here – a bit less than the thickness of a dime from what I could tell visually. Also pretty important to note that if you do this (as with most other things on this site), you can probably throw your warranty in the nearest trash recepticle…. just sayin'!
I wouldn't recommend taking off the heatsink for the 3rd chip actually. They used some white goop that was fairly thick to fill in this space, and normal thermal paste won't be thick enough to replace it. If I remember right, that chip's only rated for 4 or 5 watts anyway.
For a clearer explanation, here's a “virtual” side view:

The above shows a side-view without thermal paste. From the factory, thick paste is used to fill this space. If you remove the heatsink and clean it up… you can't just throw some Artic Silver or random-thermal-goop in there. It's got to be something that won't run off, and keeps a thick texture.
You're probably best not to remove it at all.
What I decided to do rather than finding replacement paste was to modify the existing heatsink. Basically, compared to the above picture, the new one would look like this:

You can see the orange piece added between the chip and the heatsink. I decided to go for copper or aluminum. I just needed a donor.
Luckily, I found one.
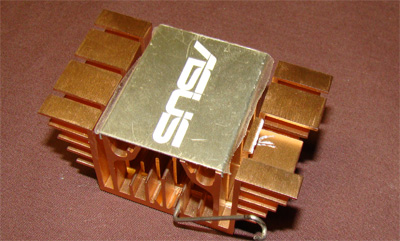
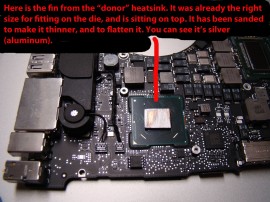
I started by breaking off a fin from an old northbridge heatsink I had kicking around, as you can see in the picture above. I used a grinder to smooth the edge, and used sandpaper to make it thinner. Then I placed it on top of the die to make sure the dimensions were correct.
Now sitting there loose is no good! It's possible I could just use a little thermal paste, screw the heatsink on top and hope it doesn't slide out, but that's probably not a good idea… if it somehow manages to slide out, it'll probably hit something else and short it out. Thus, I had to find a way to permanently attach it to the heatsink so it would stay in place.
To attach the “fin” to the original flat heatsink, I decided to use JBWeld. Solder was the other option (probably better from a heat perspective), but:
- Solder might not stick well unless I sanded the original heatsink too.
- I wasn't sure how much thickness soldier would add (whereas I knew I could get the JBWeld to squeeze really think when warm).
- It would be harder to line up the heatsink fin before soldering.
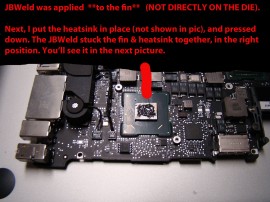
Thus, I went with JBWeld. I put the heatsink fin on the chip's die, put a little bit of JBWeld on top, then carefully lined up the original heatsink and pushed it down. The JBWeld stuck the fin & heatsink together (perfectly lined up due to this method), and I lifted the heatsink right back off.
A vicegrip was used to pinch the fin and heatsink together as tightly as possible. I wanted as much JBWeld squeezed out as possible so that it would be nearly metal-to-metal contact.
I let it dry, and now reassembled using proper thermal paste. I did a quick check to make sure that not only were things still lined up, but that the thermal paste was transferring, and then put it back together and tightened the screws.
It's worth noting that because I didn't take precise measurements, the new modded headsink was a bit thick, so it didn't want to screw in all the way. Ideally, I would have sanded it down a bit more, but instead I just screwed it in enough that I was sure it'd be tight, put a dab of JB weld on the edge of the screws (to keep them from vibrating loose), and made do.
Conclusion
I'm happy to say it's all still working great!
I'm sure it's reducing the temperature, although whether that actually matters or not… I have no idea. As I alluded to earlier, I believe it's a 4-5W chip. That's not a lot of heat. The thing might have been running at room-temperature anyway, in which case I just wasted a lot of time.
It's nice to know that if that chip was heating up for some reason, I'm sure it isn't anymore though.
Honestly, it's not a mod I'd recommend, unless you love modding stuff, or have reason to believe this chip's heating up. Before anyone asks, yes, I'm pretty sure this will void your warranty.
< Back to Main
