The original intention here was to walk you through step-by-step. However, most of the work in my case involved re-routing plumbing/drain/electrical, which was somewhat unique due to the previous install. And the rest follows the manual, so little point in regurgitating that (since you can download the install manual right from the Documentation section).
Really, the install is pretty much:
- Shut off water & power.
- Pull out your old machine (yank bottom panel, disconnect electrical, water line, drain, and pull machine out)
- Push the new machine close & hook up the drain line at the rear.
- Push the new machine the rest-of-the-way-in, routing the electical and water line beneath it in the appropriate “channels” beneath the machine.
- Adjust front legs & rear height screw. Screw the mounting brackets into the counter so the machine is sturdy.
- Hook them up. Turn water on. Check for leaks. Turn power on. Run a cycle while you watch for leaks.
I'll go into a few of the tricky points I ran into shortly.
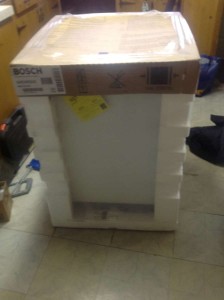
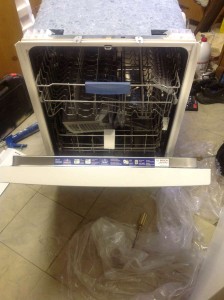
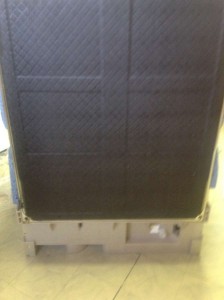
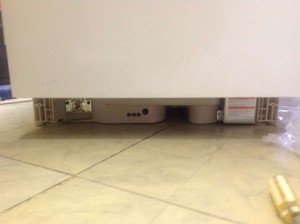
But first, I'm sure somebody came here hoping to see images of the machine itself for one reason or another, so here are a few shots I took of the Bosch SHE23R52UC (300-series) before I slid it in… (click for larger images)
You can see the packaging, most of the hook-ups, and get a general idea as to where your routing must be. If you weren't sure about something before, hopefully it helps.
Now, the tricky points during the install…
The Bosch assumes all your connections (water/gas/drain) come in from the rear of the cabinet – if yours already do, great! (you can stop reading this part and skip to the next).
Our old short-tub machines had lots of space below – decades ago, the connections came up through the floor whereever it happened to be convenient. The replacement short-tub we'd previously put in had enough space that we could just move the lines around. In the Bosch SHE23R52UC, that wasn't the case. There are 2 “channels” along the bottom where you can run lines – that's it. The hole in the floor (or side of counter) to run the drain flex-pipe to your drain system must be somewhere at the rear. While the water/electrical connects to the front of the machine, ideally it starts at the rear and runs to the front through the 2 “channels” at the bottom of the machine. Technically, they could come up from the floor somewhere other-than-the-rear, though if they don't come up exactly where the connections are, or within the “channels”, you'll hit issues.
The Bosch drain-hose is a pain, *because* it's at the rear (probably similar to all tall-tubs).
Unless you have a way to access the rear area of the machine when it's installed, you have to hook up the drain hose before you slide the machine in, which means that as you push the dishwasher in, that “excess” drain-hose will route itself however it sees fit. Since you're supposed to have a high-loop in the system, I attached it in a manner that faced upwards, and would route itself in an upside-down-U fashion.
If you're using a sink-drain, you can probably do your high-loop near the sink (and you may have an air gap as well anyway). However, if your dishwasher has it's own drain connection in the basement (like me), the only place you're able to do the high loop is probably behind the machine.
Copper pipe directly to the water inlet is pretty much a no-go…
Technically, it's possible (Bosch mentions to consult a plumber in this case). To do it, you'd need to run the pipe up from the floor almost *exactly* where the water inlet will be when the machine is installed. In addition, you probably wouldn't be able to run the pipe itself up through the floor until the machine is pushed in (and basically installed), because otherwise the pipe protruding from the floor would stop the machine from sliding in/out.
PEX and/or braided dishwasher hose will work, as they can be run through the channel. Of course, the old system here had a copper pipe coming from the floor, not in the correct location for this machine, and thus, I had a fun little conversion to make to braided dishwasher hose.
90 degree 3/8″ NPT elbow
This is the L-shaped fitting (not included with the dishwasher) that you need to connect the dishwasher to your water supply. This comes with most new dishwasher hose.
The big note here is that when I first hooked it up, it faced upwards (instead of to the right, where I wanted it). I had turned it so tight trying to get it pointed “right”, that I thought any tighter would crack something… and still, it leaked/dripped when I turned on the hot water & ran the dishwasher for the first time.
However, with the hot water going through it, I found I could turn it a little further by hand, which stopped the leak, and also oriented it in the proper direction (facing right).
So there's a little trick for you. If it's not “aimed” quite right when screwed in, and happens to drip, rather than turning it so hard that it cracks, run the dishwasher and as soon as it heats up from the hot water, it'lll probably move a little more by hand until everything's perfect. Of course grabbing the thing while it's running probably isn't the safest thing to be doing – don't get burned/electrocuted in the process.
Running the electrical wire & the conduit conductor (strain relef)
Check the manual – when “setting up” you need quite a bit of excess wire, enough that quite a bit will stick out when the dishwasher is pushed in. The reason is… if you only have enough wire to reach the connectors, you won't be able to secure the strain relief. Thus, you need excess.
Unfortunately, this excess wire has to be jammed into the channel once the strain relief is connected to the plate & you're attaching the plate to the dishwasher. And there isn't a lot of room to jam excess wire – the channel is narrow and wire does not “cram” easily. That said, as tempting as it might be, don't skimp on the wire length too much – if you accidentally cut it too short (to the point where you can no longer attach the strain relief), you're screwed.
A final note: if your strain relief screws have the threads pointing to the right-side (as viewed from the front when it's installed on the dishwasher), the threads might catch, and you might not be able to get the plate back in. If your plate isn't going in, and you're sure it's not simply “excess” wire resisting, chances are the strain relief screws are catching – pull it back out, rotate the relief a bit, and try again.
On levelling the dishwasher
I'm pretty sure there's a reason the manual is very clear about how to use the adjustments (1 on each front leg, 1 front screw that raises/lowers the rear), but isn't abundantly clear as to how you actually determine whether the machine is level (one of the diagrams seems to show 1 of the levels “floting” inside the machine).
It's a pain to be accurate, because once the machine is in, typically there's no room at the top or along the sides. Your only option is really to use the front face of the machine.
That said, I'd be inclined to simply make it “square” with the rest of the counter, for 3 reasons:
- Your counter is probably already fairly square (if not perfectly square).
- It'll look nicest.
- The dishwasher shouldn't care that much about being perfectly level (unlike a front-load clothes washer which can make it sound like your house is coming down if it's not perfectly level). “Close enough” should be fine.
To make it “square” with the rest of your counter, it's easy enough to do by eye. View it from above (make sure the top of the door looks even – push/pull left or right side if needed). Then use the flexible molding to determine front/rear/up/down – once it looks even all-around, you're probably set. It could be worth plopping a level against the machine when finished just to make sure you're not way-out.
Turning power/water back on
The final note (and most important note)…. Not Bosch-specific, but important any time you wire in an appliance that deals with electricity & water… Once it's installed and it's time to turn the water/power back on, do it gradually. It's good to have a helper watch the dishwasher so they can yell if you turn something on and water starts pouring. Ideally, you'll keep the lower front panel off for the first wash so that you can observe the water inlet.
What I typically do:
- Turn on the water supply first. Check for leaks. Note that since there's probably air in the line, you might not get any water coming out (but if you hear air coming out of a fitting, you will probably have an issue).
- Flip on the breaker. Keep a keen eye out for smoke (again, good to have a helper who can yell if they hear/see/smell something bad). If your breaker instantly trips, something's wrong.
- Make sure the dishwasher powers on. Hit the power button on the dishwasher (or have the helper do it) to make sure it lights up. If it doesn't power on / light up, you might have a bad (or worse, wrong) electrical connection in which case you'll want to immediately turn the breaker off and recheck all the wiring.
- Run the dishwasher. On the first fill, you might hear air making it's way out of the lines, but listen for anything else you're not expecting. If there are leaks in the system, this is probably when you'll find out. If all-heck-breaks-loose, be prepared to run to the breakers and kill power (and run to the water supply and shut it off).
- Watch the dishwasher until it's gone through a complete water/drain cycle. Since you can't see the drain fitting at the rear of the machine, you'll have to keep a watchful eye out for water leaking from there – by the time you actually see the water, chances are that much has poured out. It can help to periodically check the basement in case water leaked and found a hole to pour down.
- Assuming the first wash went off without a hitch, you can install the lower front panel. You may want to temporarily kill the power first (in case you somehow manage to catch the electrical box while trying to work the panel in the tight space).
Again, the manual walks you through just about everything. So long as your lines are set up / positioned properly, the process is relatively simple. If they aren't lined up…. plan to spend a lot of time re-working those aspects.
<<Back to Main Site


